Add Store to Account
For the initial setup, you will need to contact PFL and request that your store be associated to the account you have created in the portal. Once this step has been completed, you will have admin privileges to that store in the portal and will be able to add other users as well as set and manage permissions.
Add User to Store
Step 1 : Open your store from the homepage, then navigate to 'User' in the left-hand list.
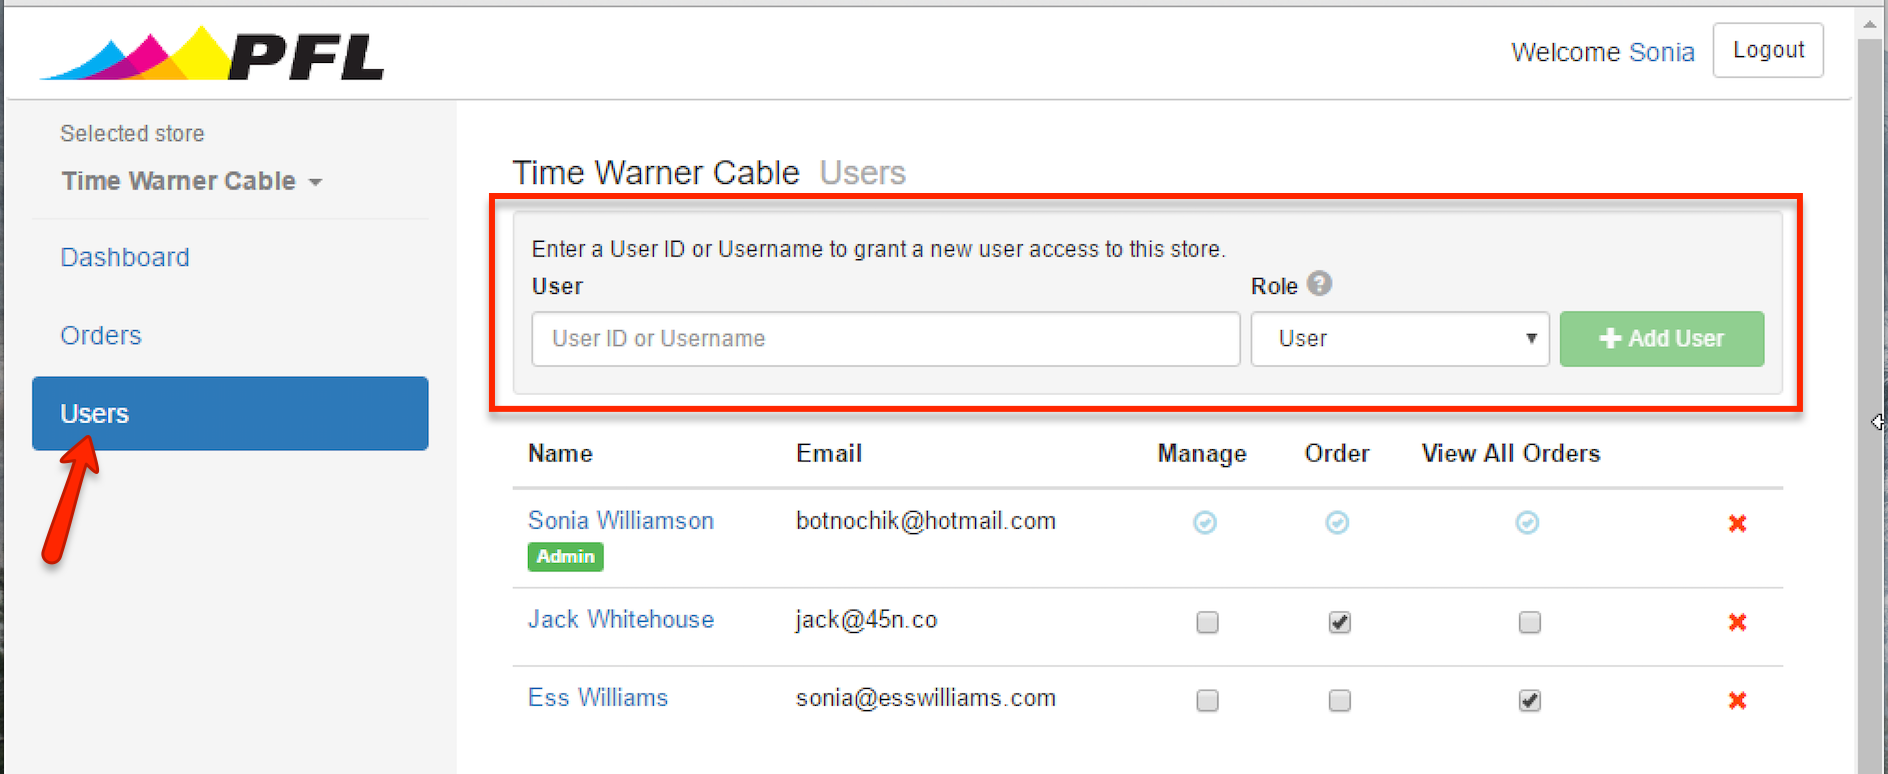
Step 2 :The user you wish to add must have already created an account in the PFL Portal. (If they have not done so, have them create one by registering.) Once they have created an account, simply enter either the username they chose when they created their account or their user ID (which can be found in their user details).
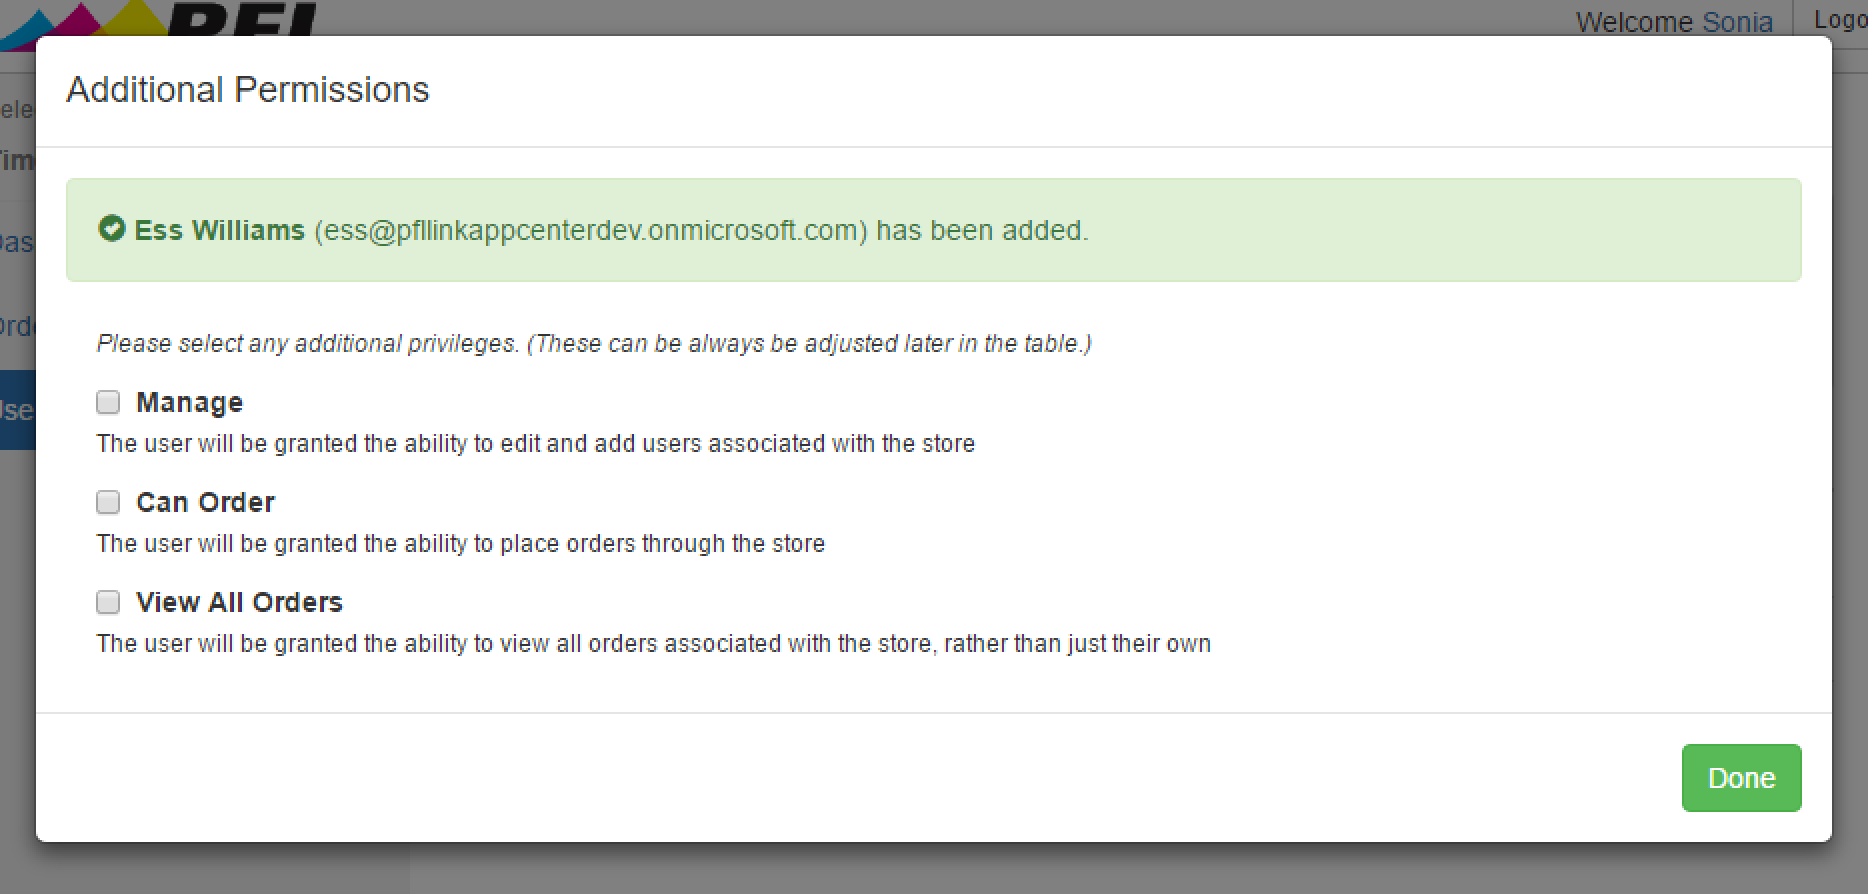
Step 3 : Either leave the Role dropdown set to 'User' or choose 'Admin' then click the 'Add User' button. If you are adding the user as a 'User' rather than an 'Admin', a modal will pop-up with the ability to add additional permissions for that user. (Any of these permissions can be adjusted later). If nothing additional is set at this point, the user will be able to see other users of the store and view their own orders, but will have no editing rights.
Note : If a user has been added to a store as 'User' and you wish to switch them to Admin privileges (or vice versa), simply delete them from the table and re-add them with the desired role. At this time, the two roles cannot be switched between without removing and re-adding.
Create Application
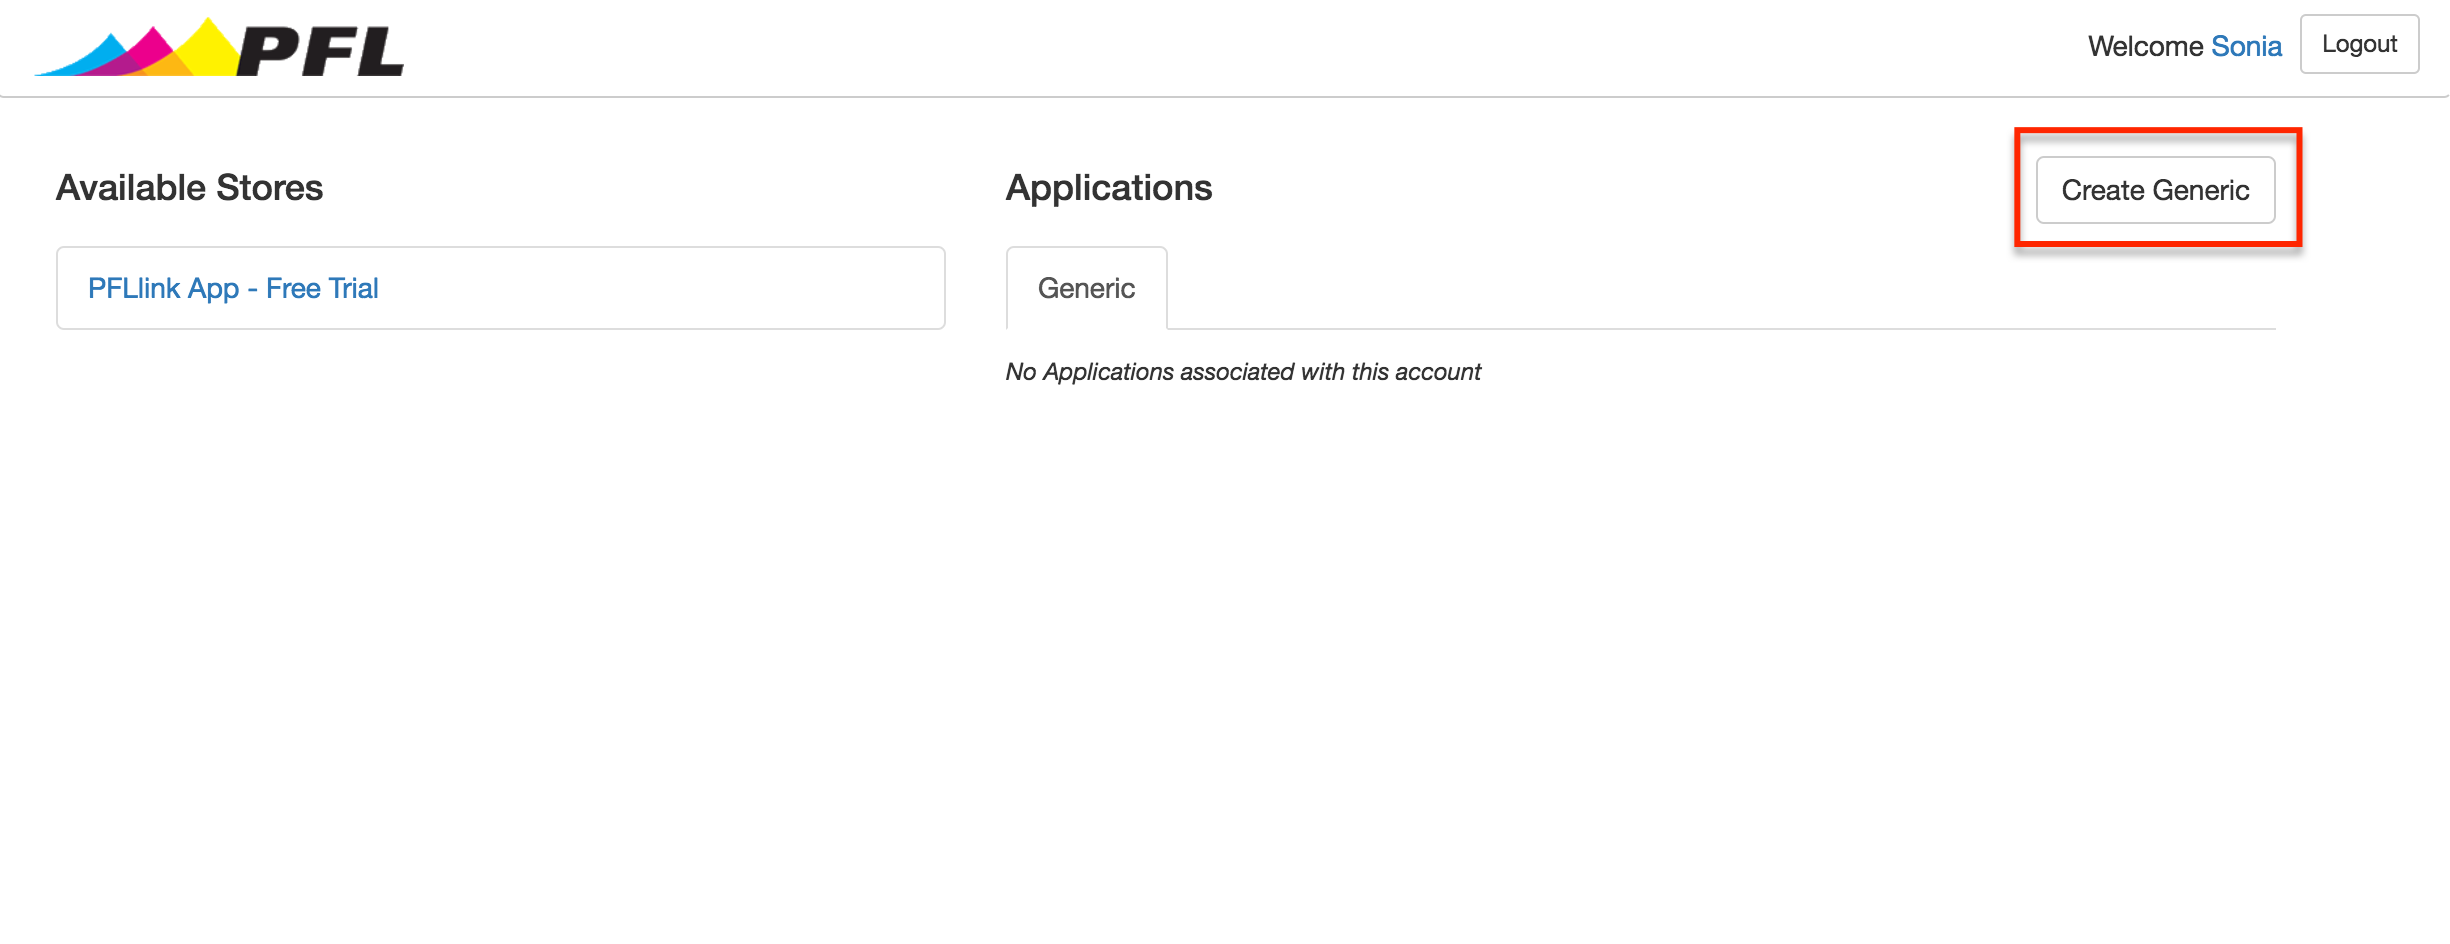
Step 1 : Login to the PFL portal and click the 'Create Generic' button.
Step 2 : Enter a name for the application and an email address.

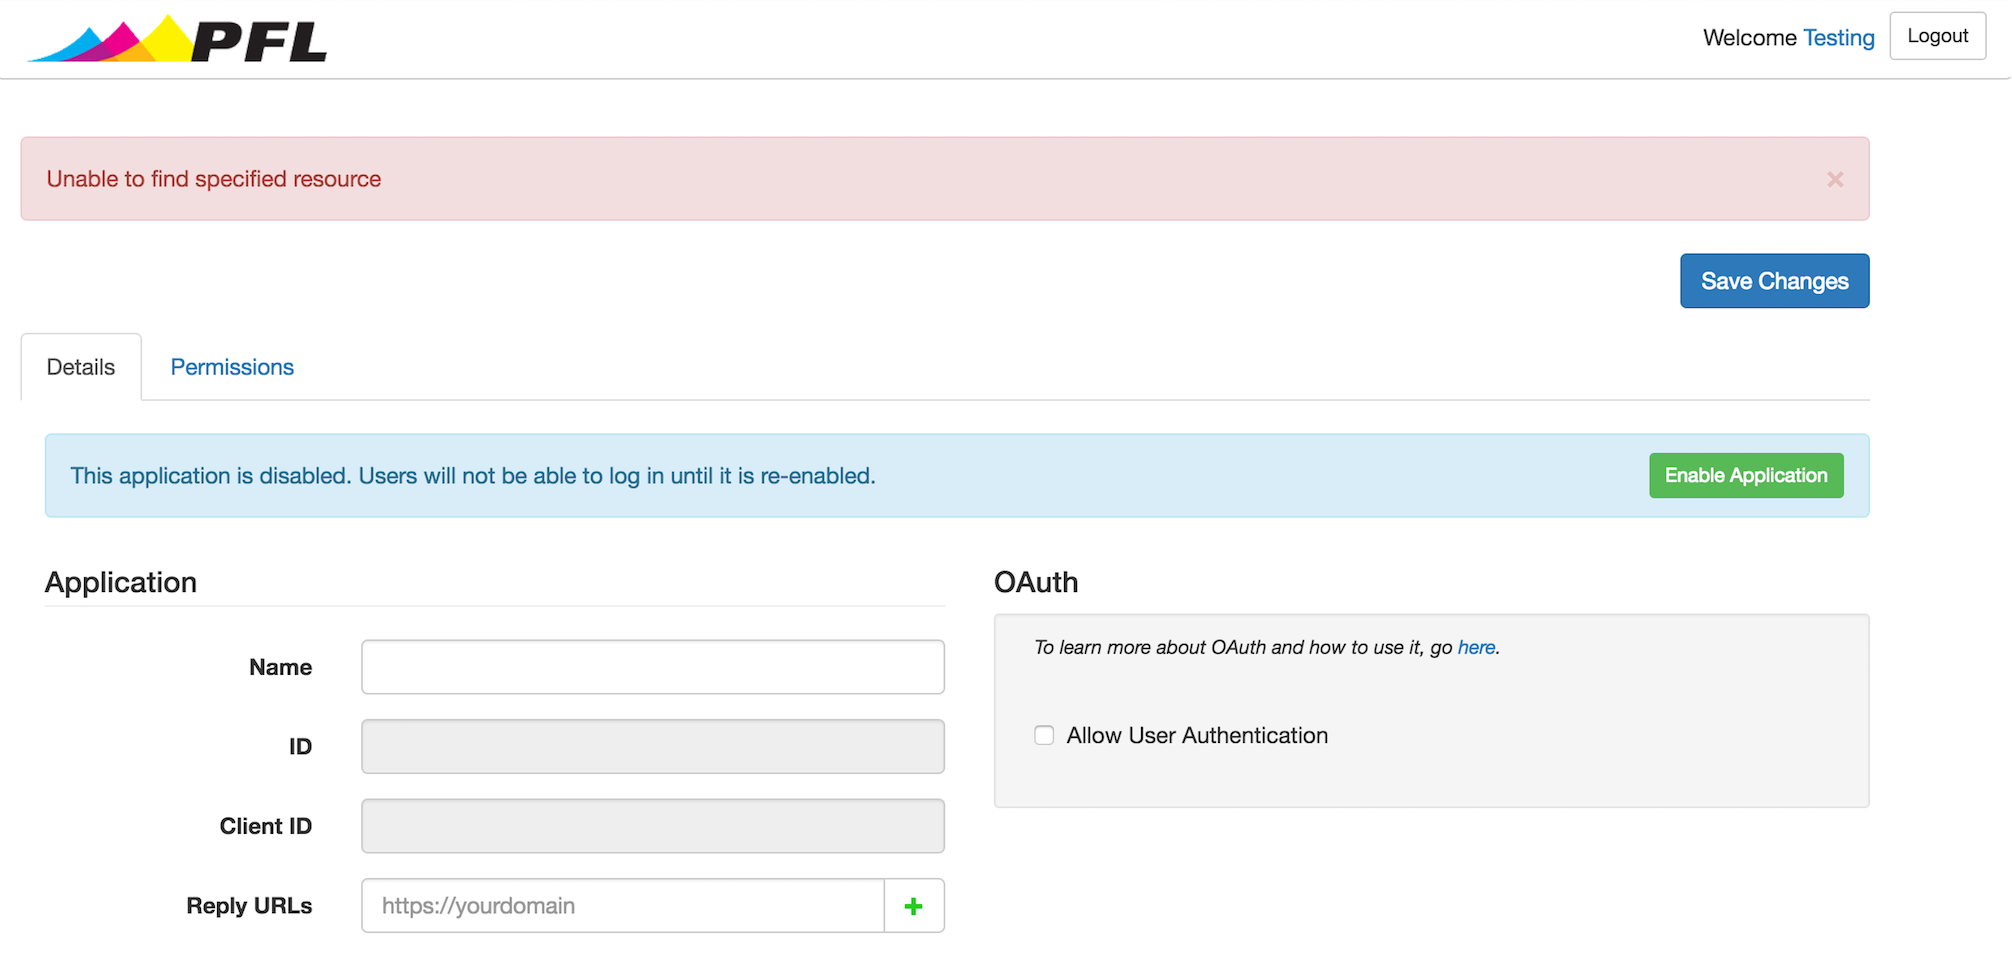
Note : After this step, it's possible that the next screen will look like there was an error (as seen below). If that's the case, it's because there was a slight delay with the AAD. If you wait a few seconds and refresh, the page details will load properly.
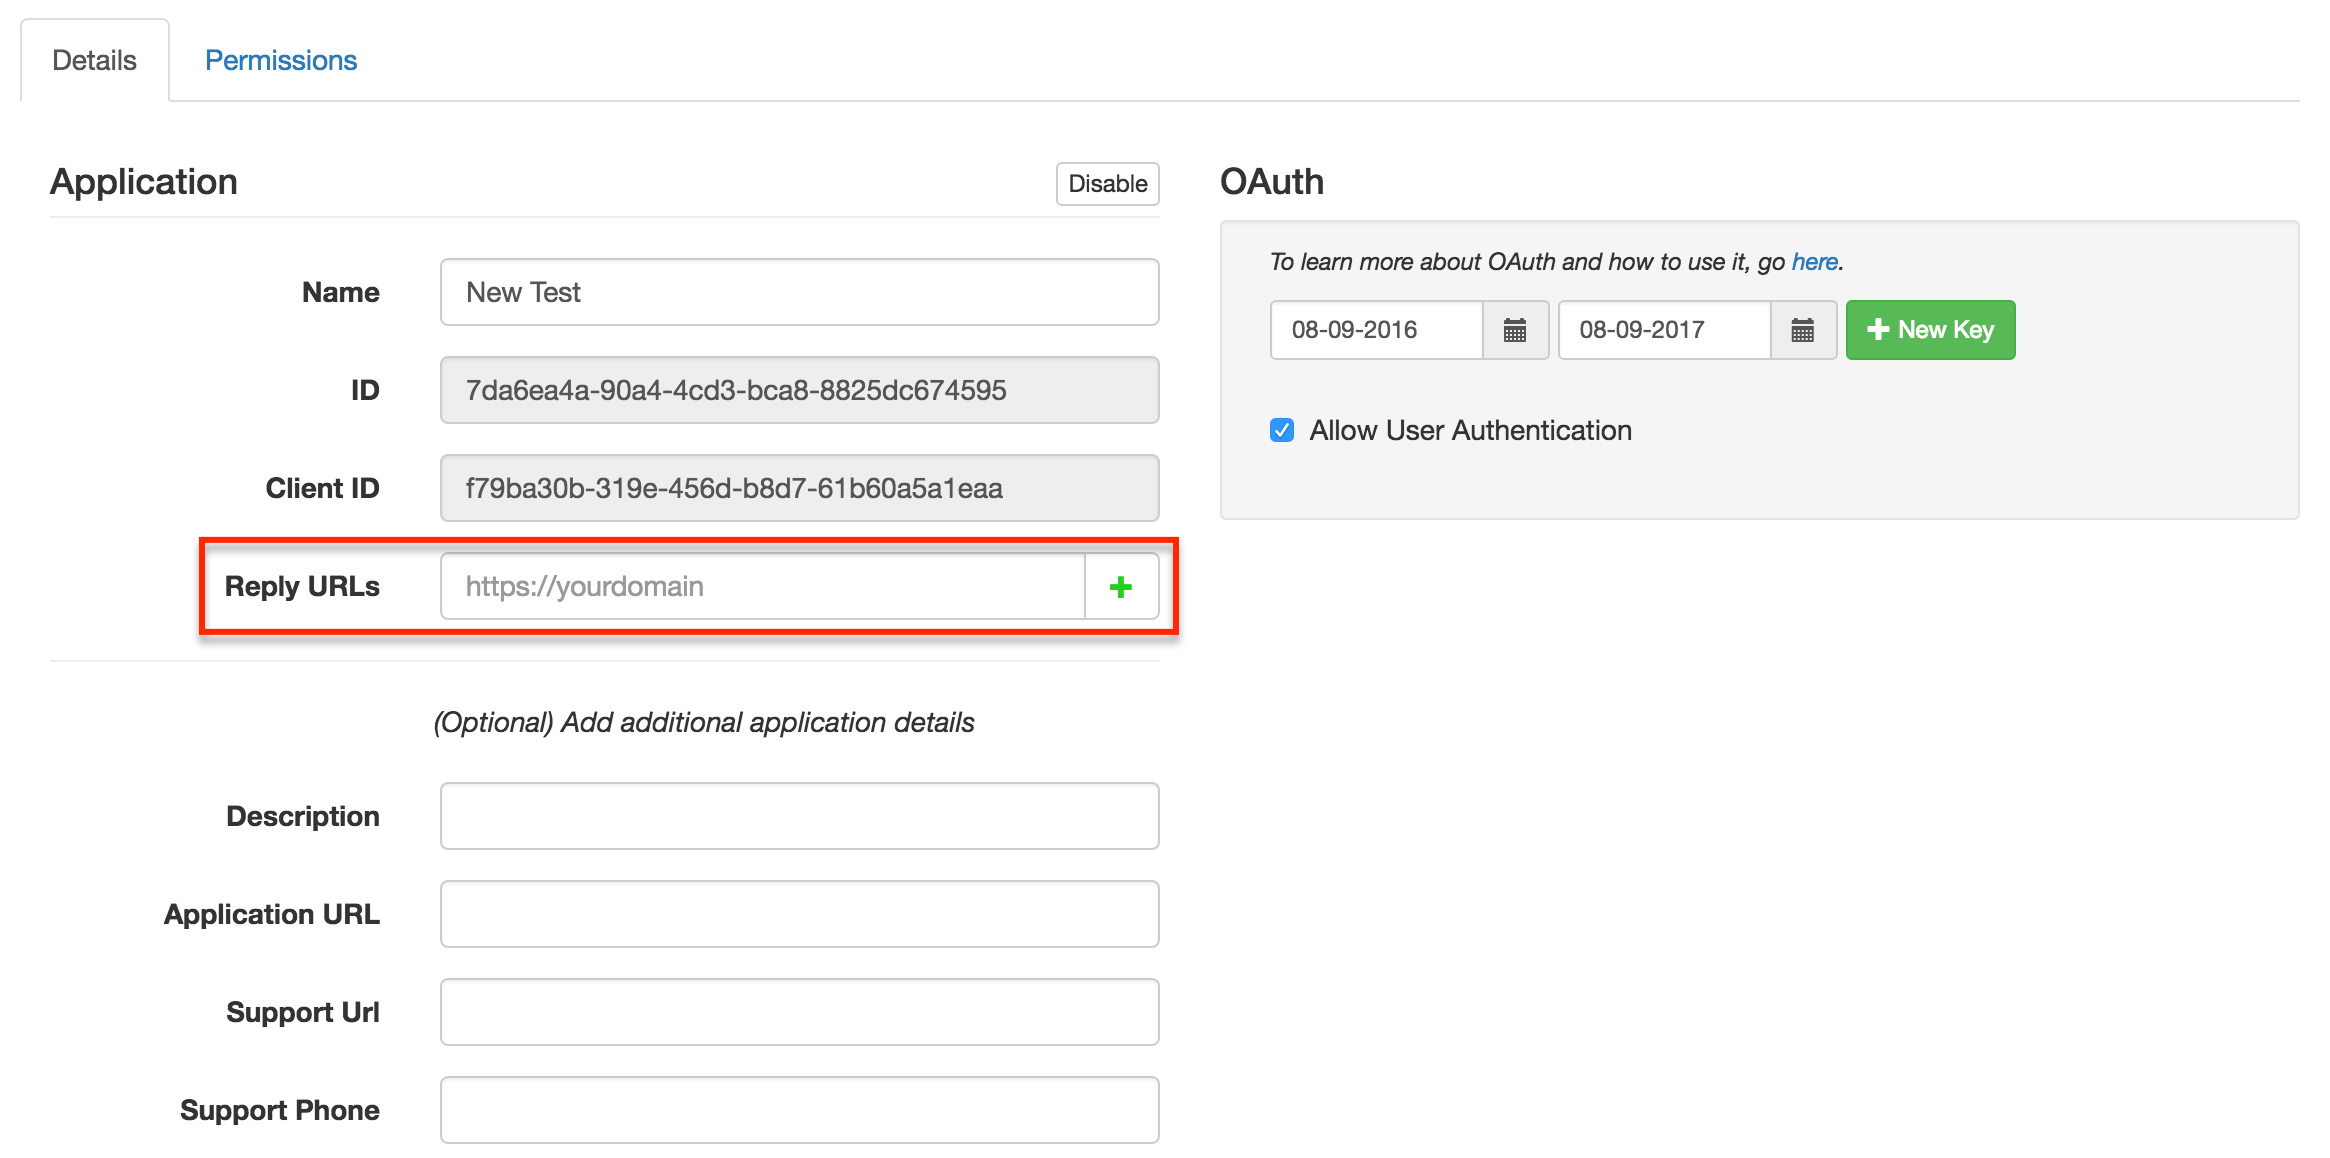
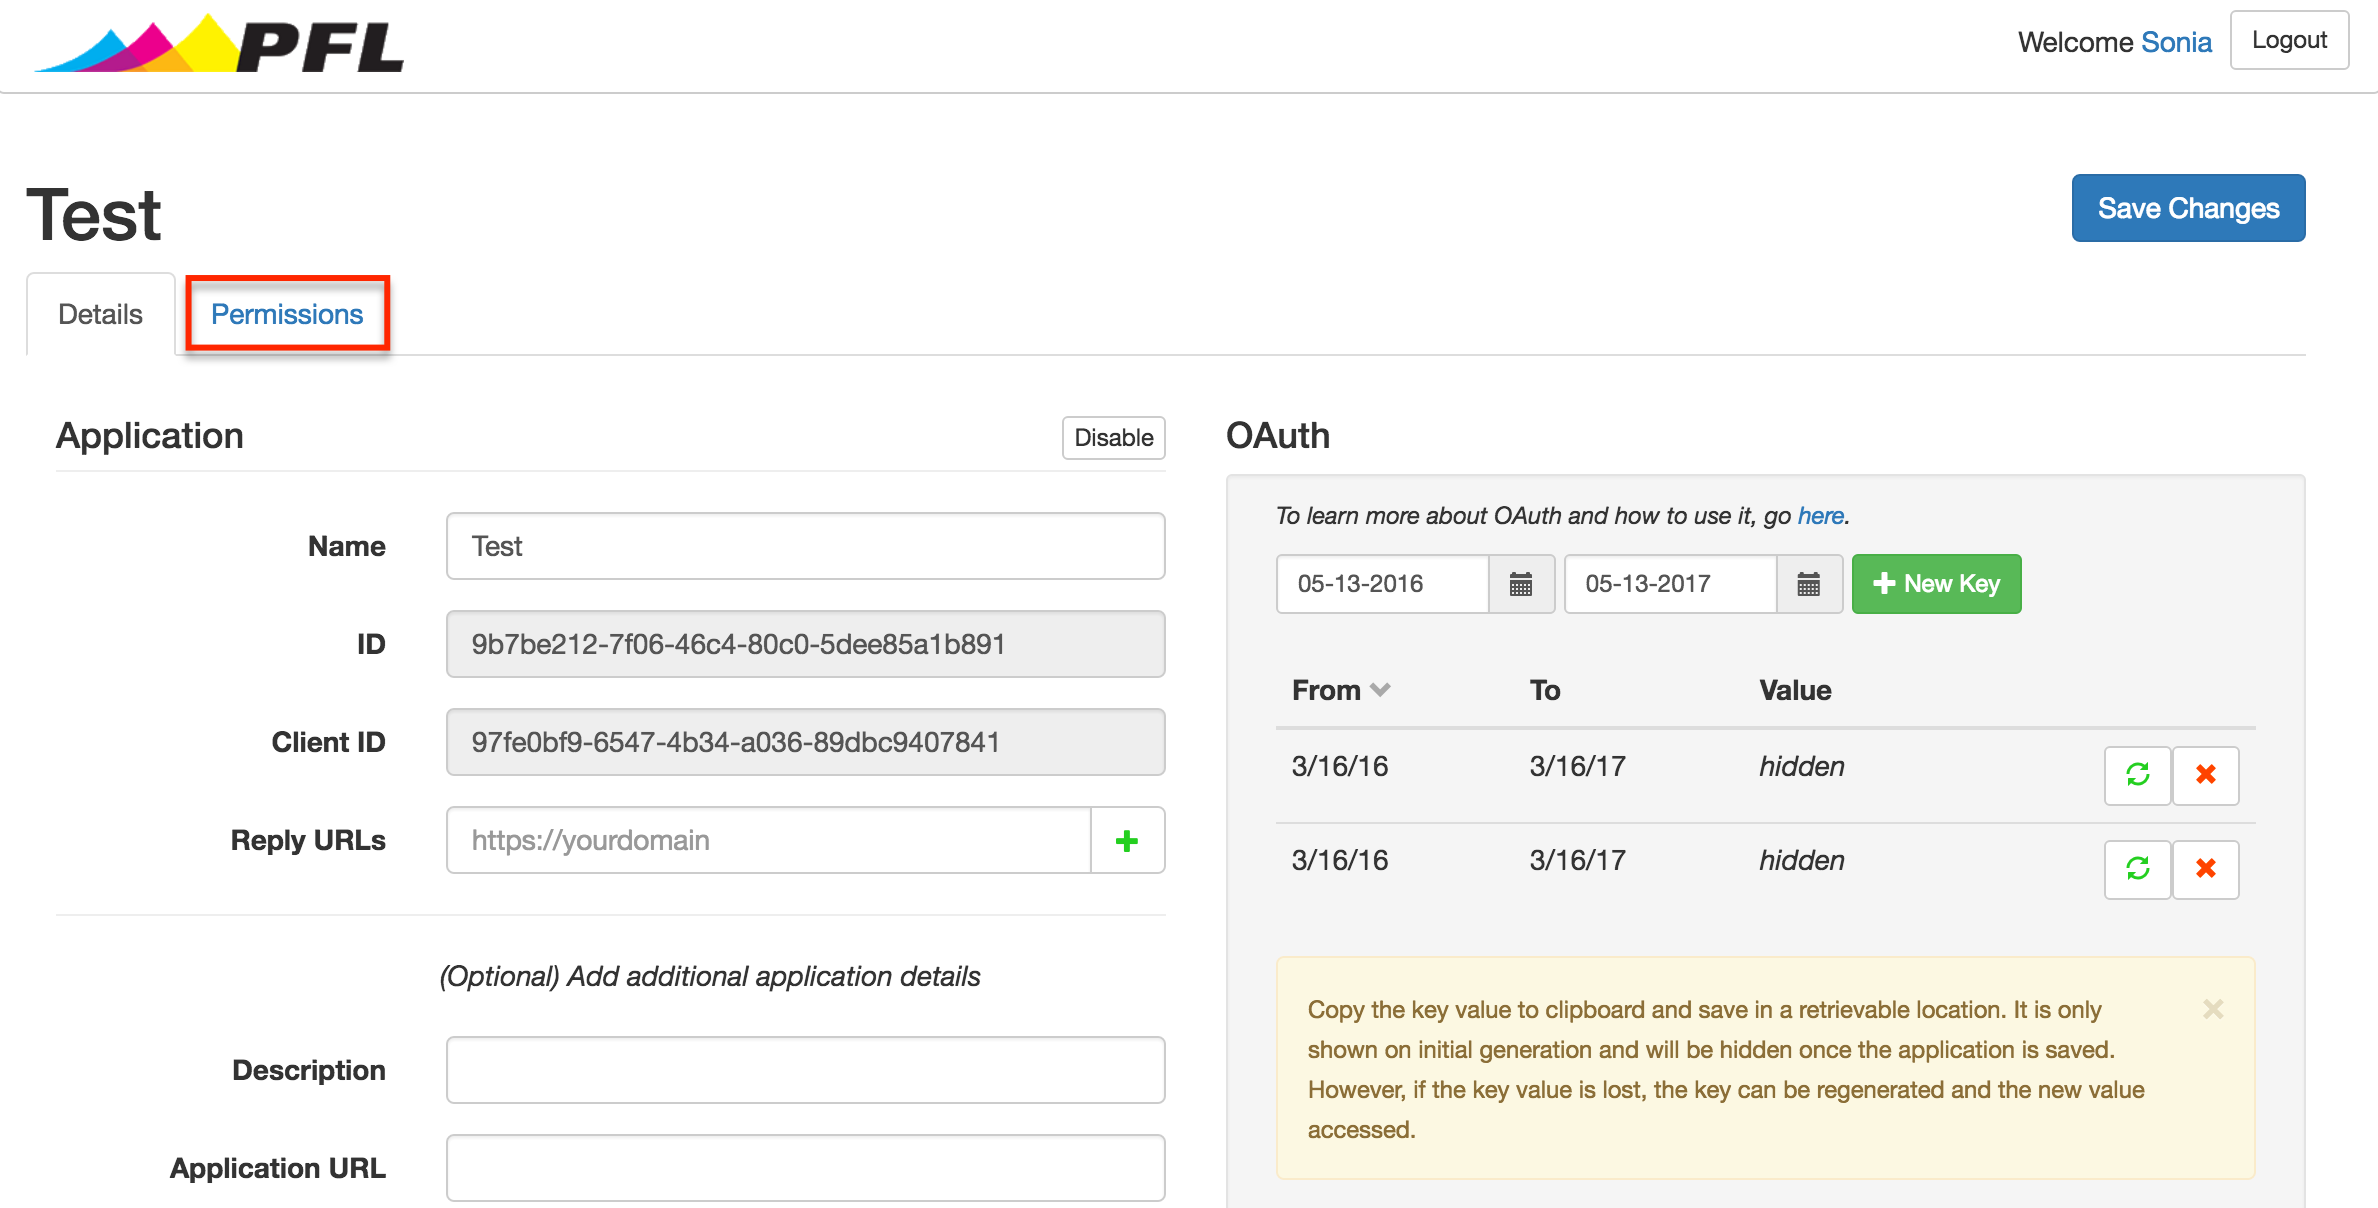
Step 3 : Set-up the OAuth verification by first adding the appropriate Reply URL (or URLS) for the OAuth callbacks in the Application section
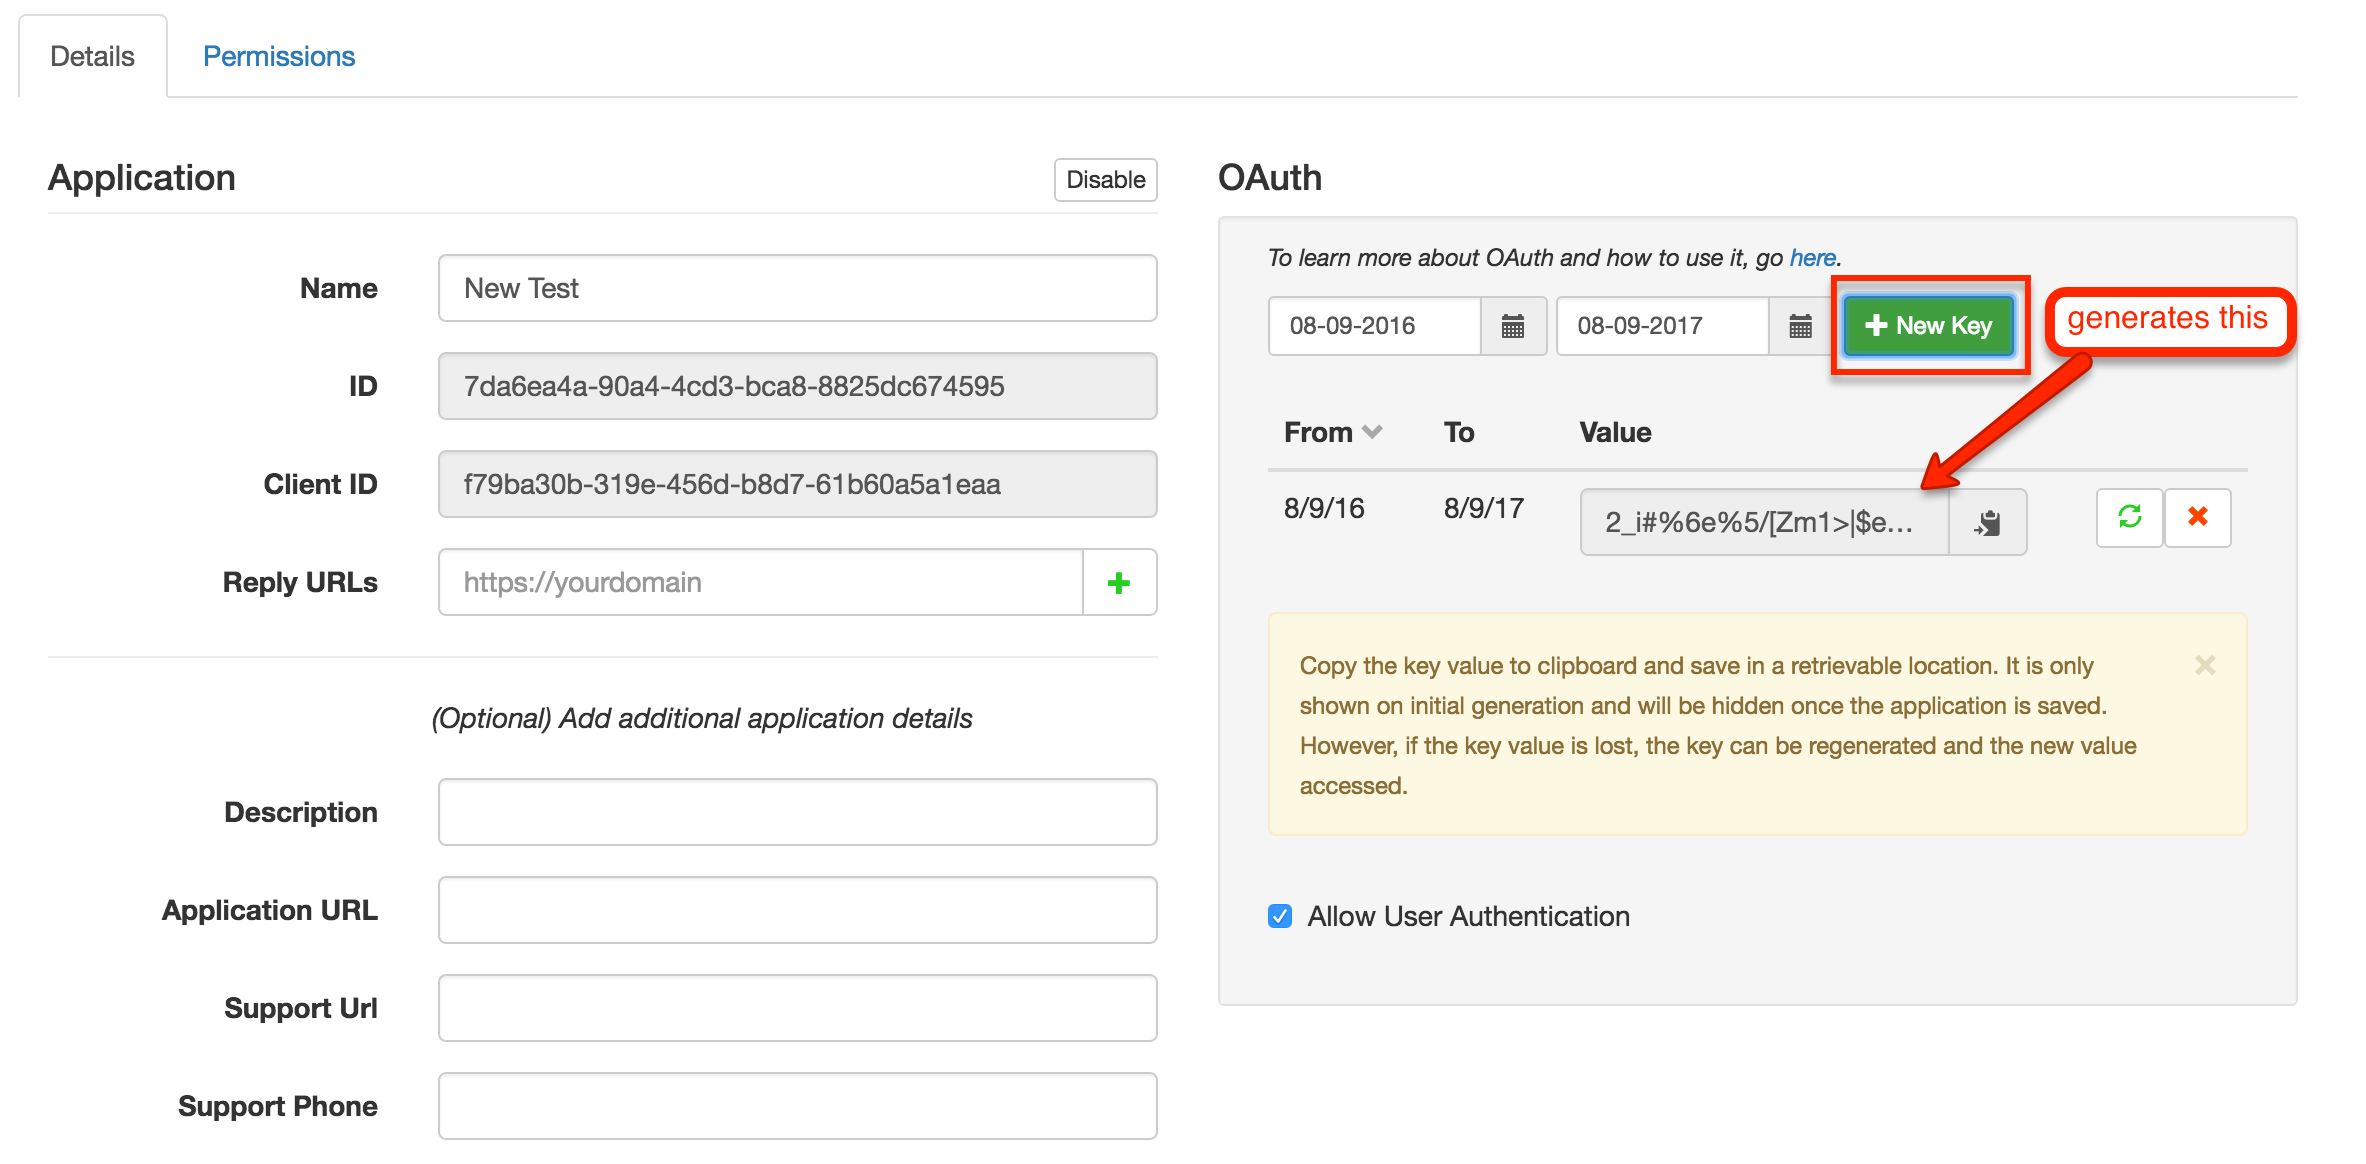
Step 4 : Next, in the OAuth section, choose your preferred date range (if nothing is set, it will default to a year from the current date), then click the New Key button.
Be sure to copy the Key value somewhere you can retrieve it again; you will need it later for authentication and this is the only time it will be shown.
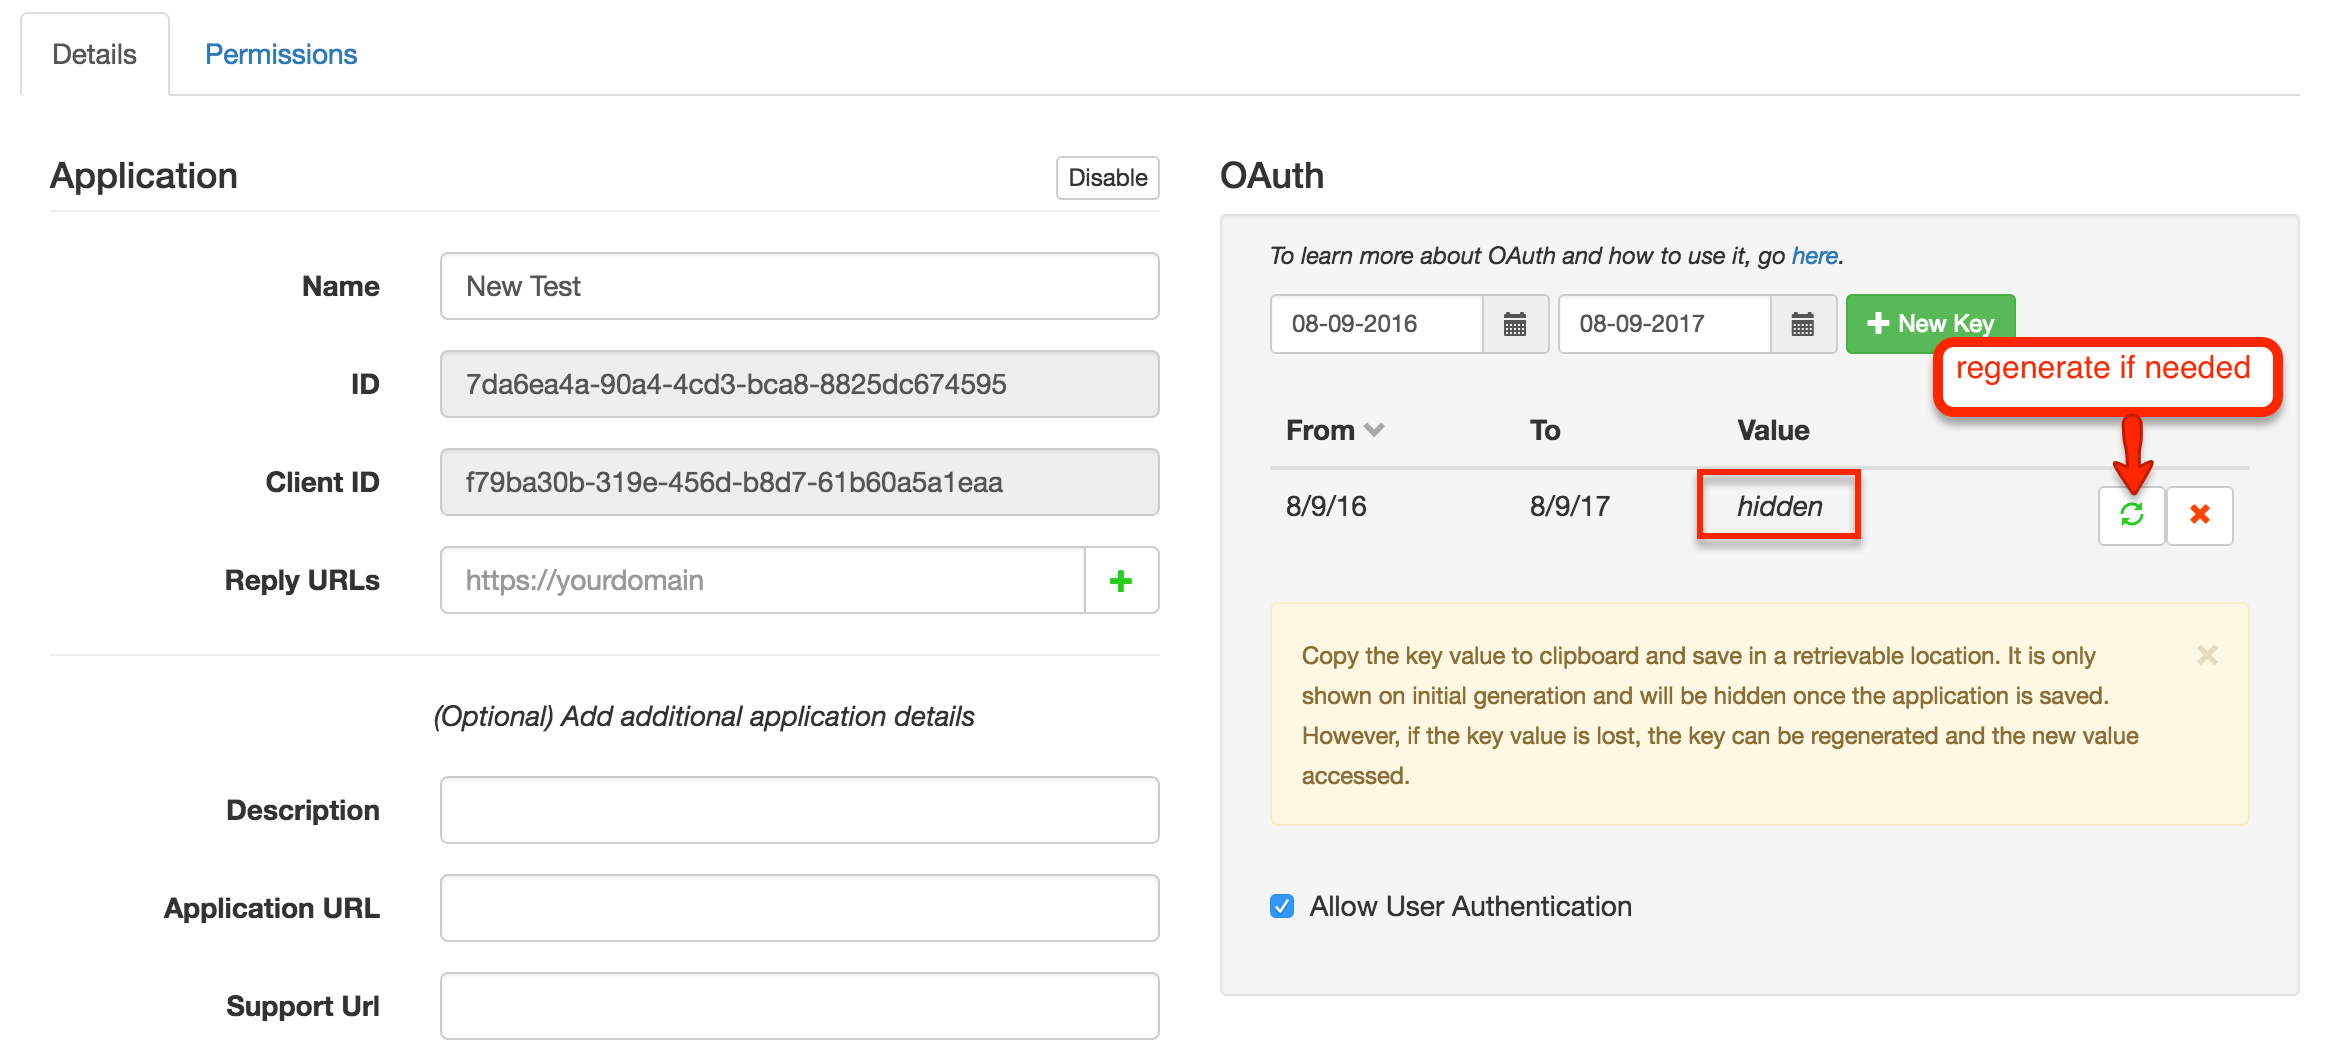
As soon as you save changes, the Key Value will be hidden. However, it is easy to regenerate.
Note : If the application has been authenticated using one Key Value and someone regenerates, it will essentially break for anyone using the old key. That will need to be updated so keep in mind that while it is easy to regenerate the key, it comes with repercussions once the application has been authenticated.
At this point, follow the steps for authenticating the application found here : Authenticate
Step 6 (optional) : The Permissions Tab is where you will associate the application to a store. Do so by inputting the Store ID (Store API Key) and clicking the 'Add Store' button. This is typically necessary if the Application will be using the Client Credentials OAuth flow for submitting orders (which is the most common use case). However, if you plan to submit orders via user impersonation, there is no need to associate a store specifically to the application.
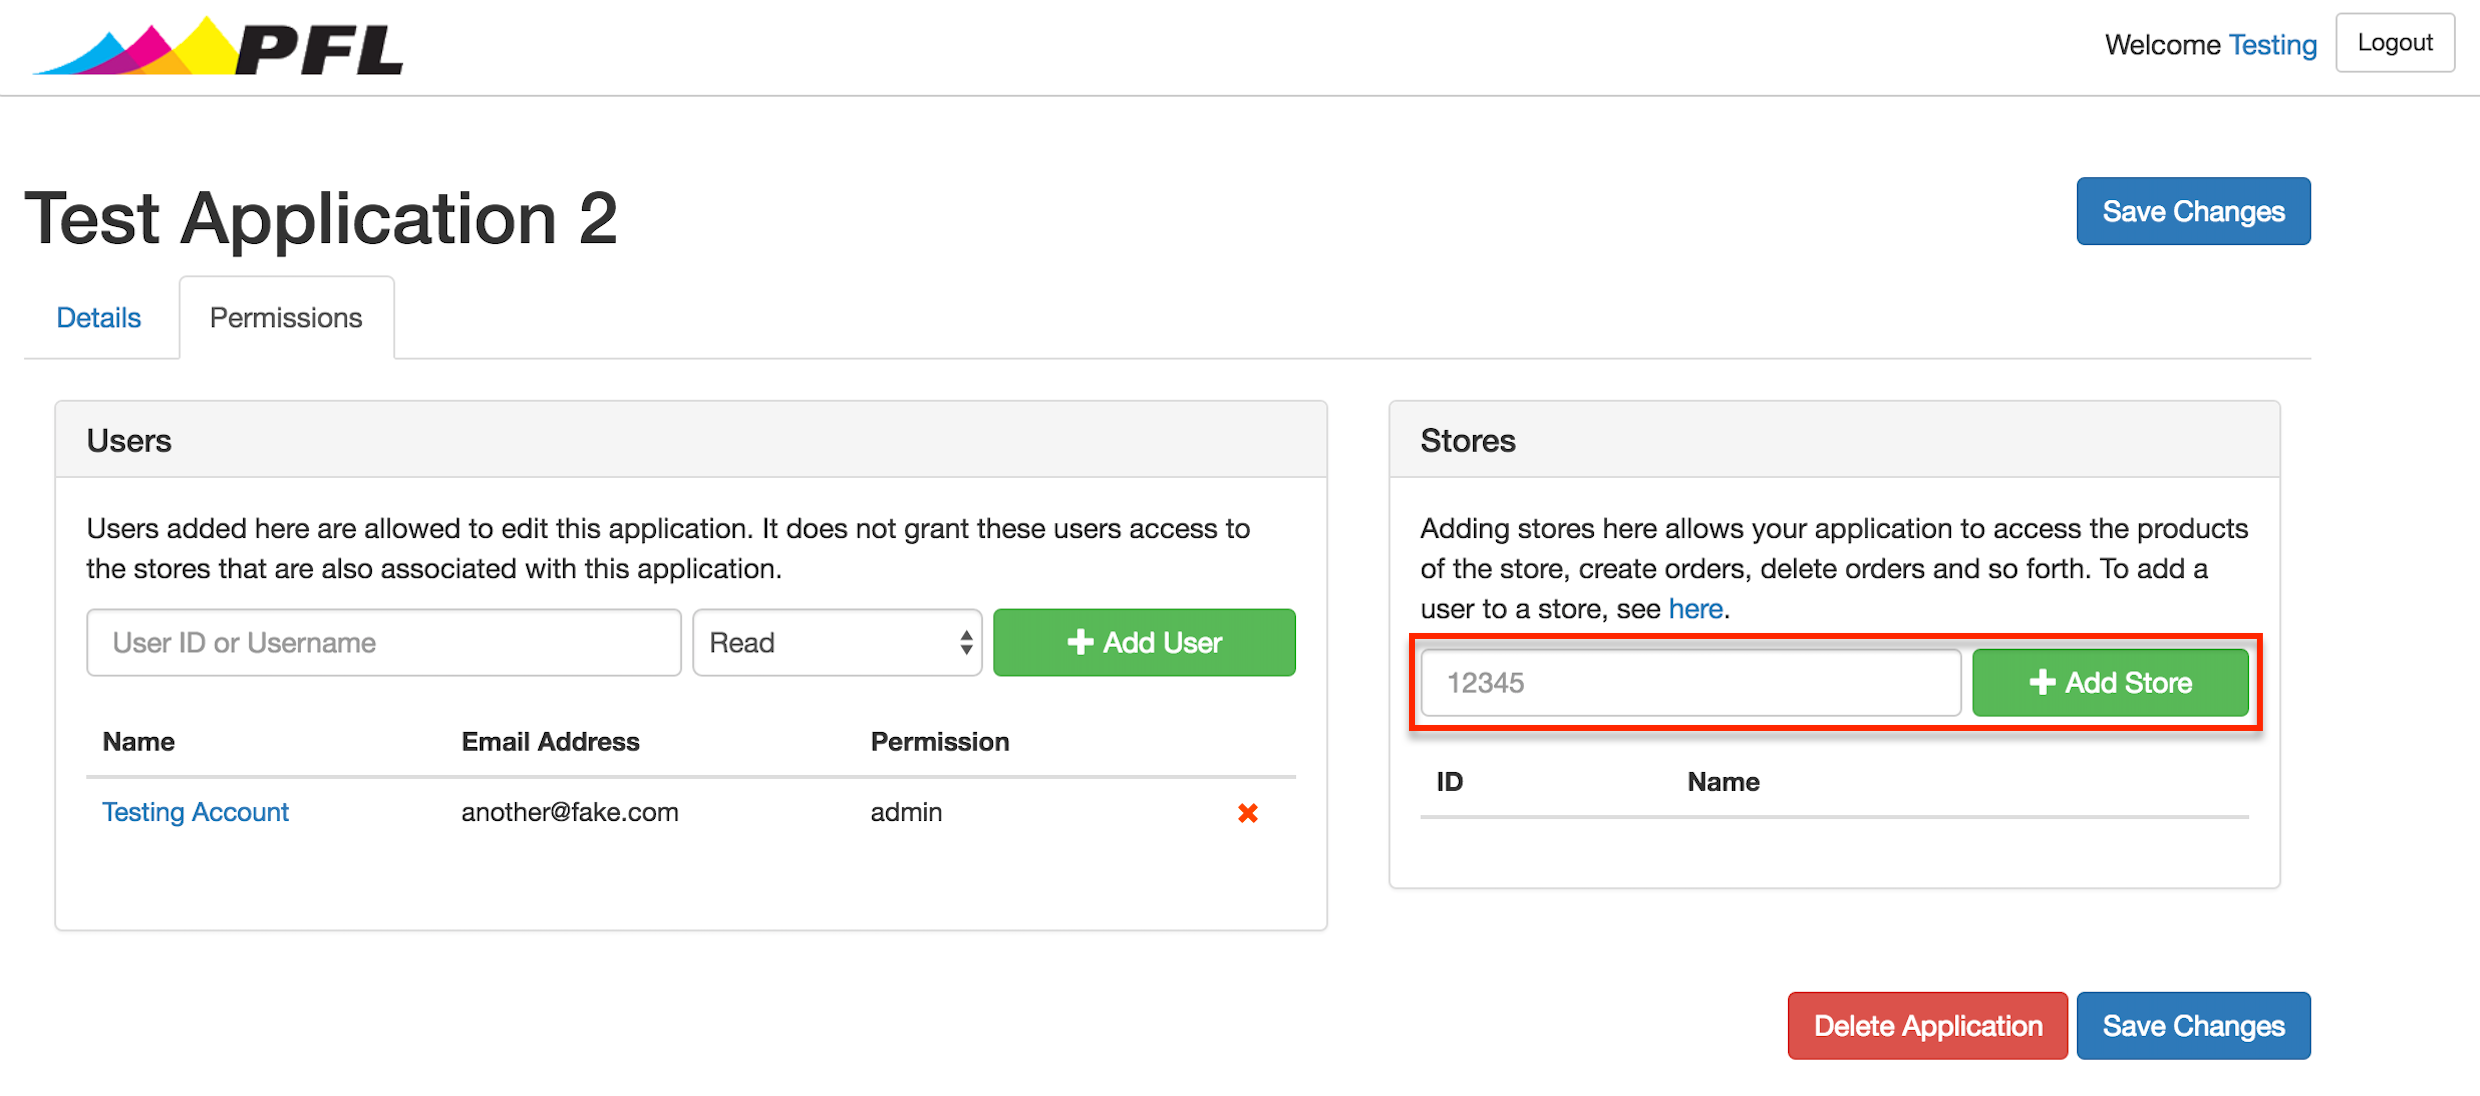
Step 7 : Save changes.
Set Application Permissions
Step 1 : Open your application from the PFL Portal homepage, then navigate to the Permissions tab.
Step 2 : The user you wish to add must have already created an account in the PFL Portal. (If they have not done so, have them create one by registering.) Once they have created an account, simply enter either the username they chose when they created their account or their user ID (which can be found in their user details). Give the user either 'Read', 'Write', or 'Admin' privileges to the application from the dropdown menu, then click Add User. The user will be added to the table.
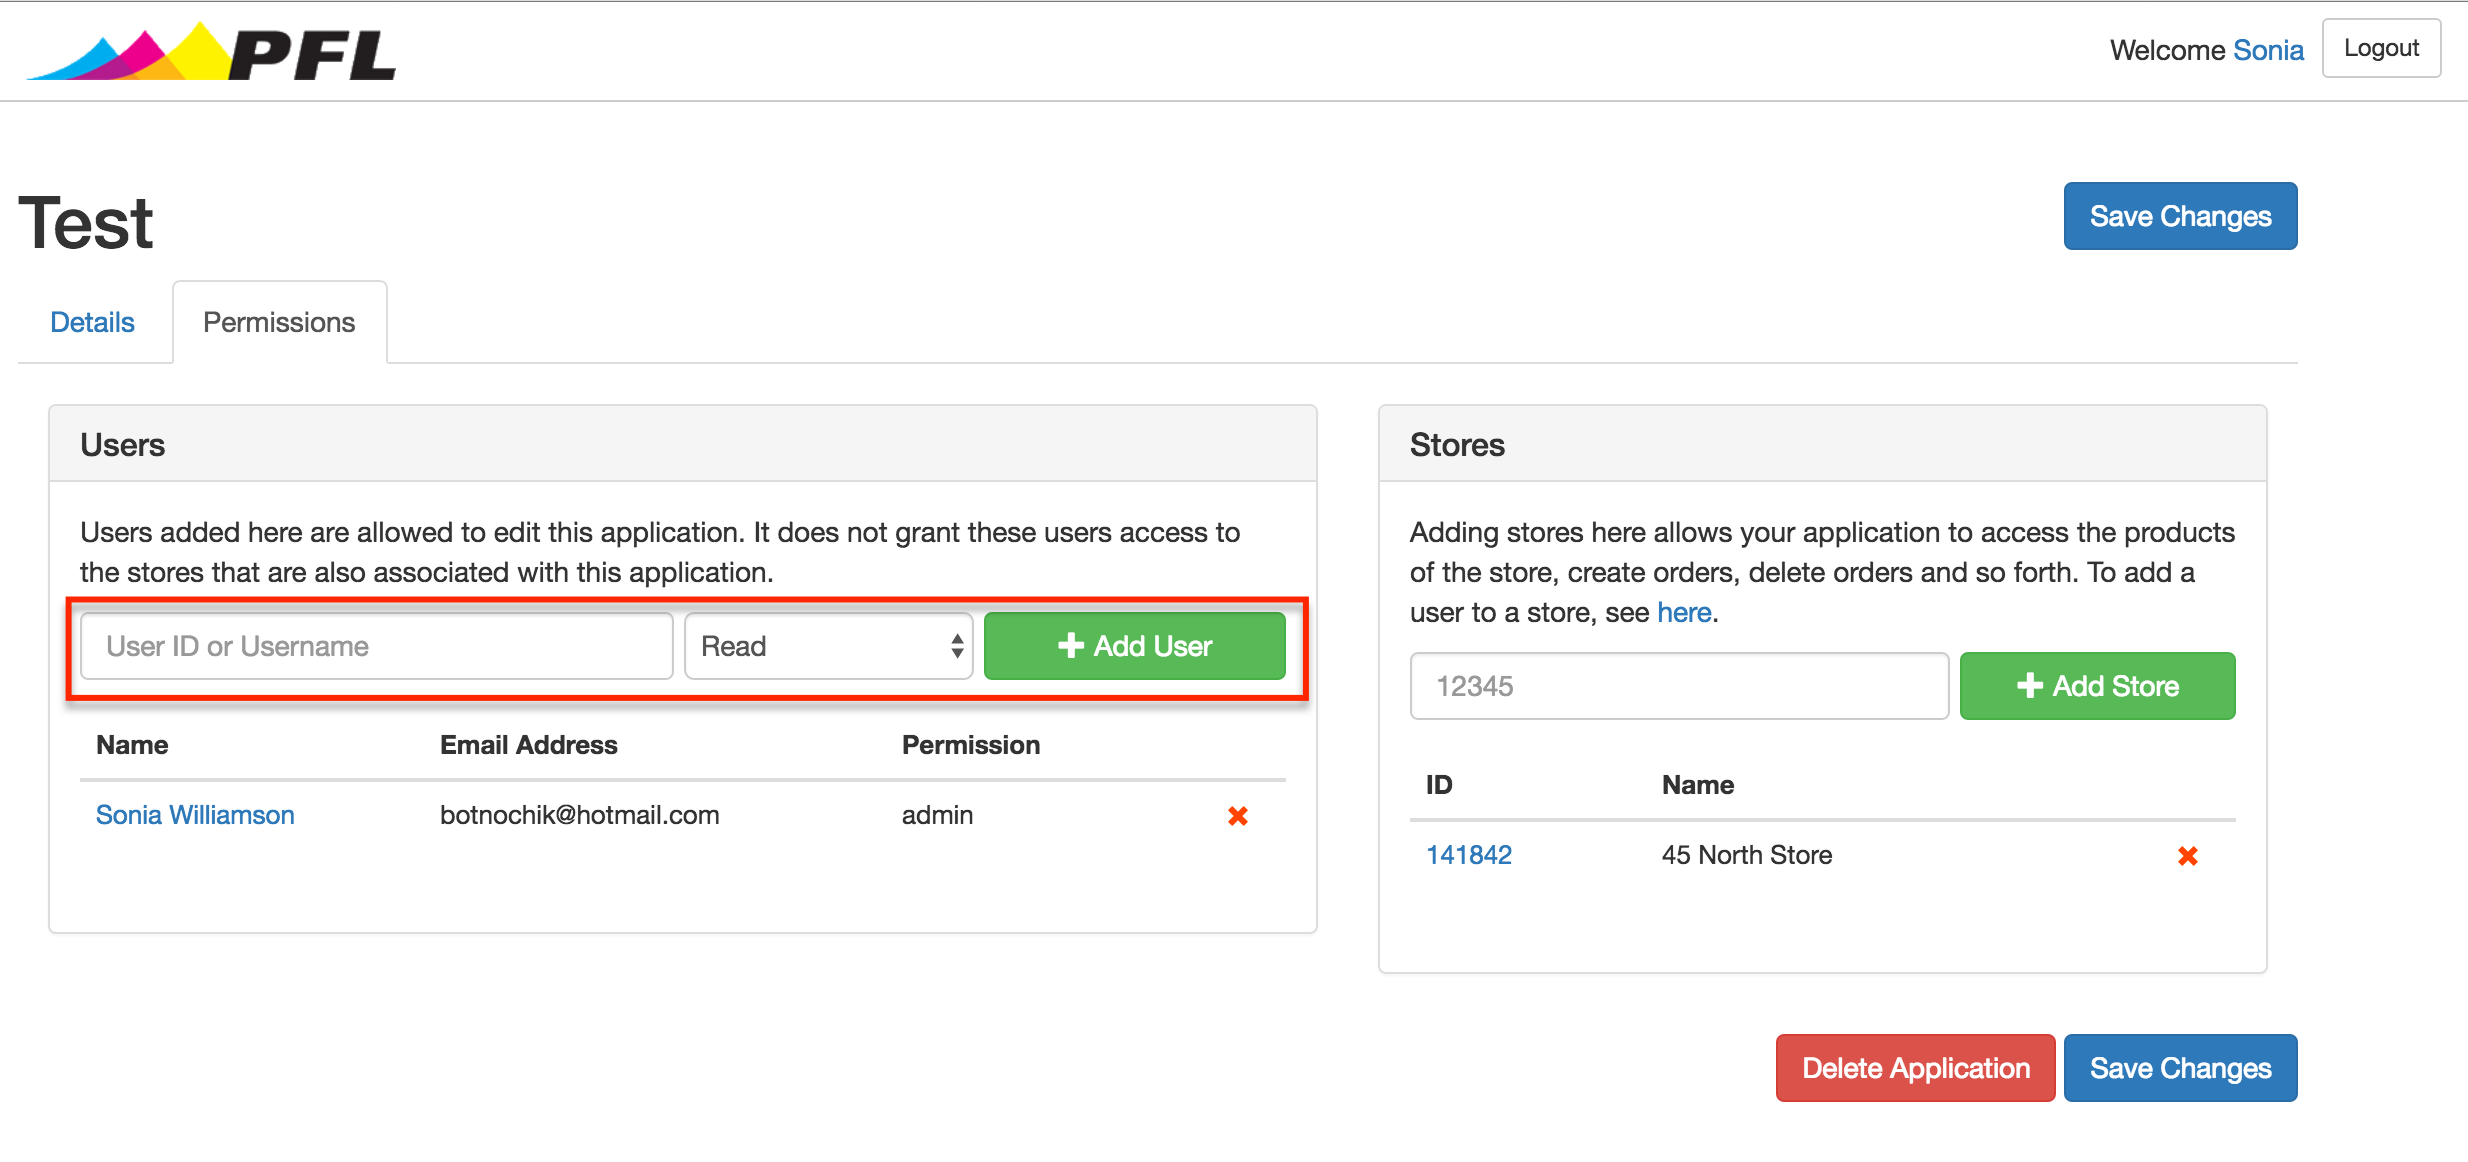
Note : Once a particular permission has been granted, it can't be adjusted in the table; however, a simple work-around is to delete the user and re-add them with the preferred permission.
Set Product Notifications
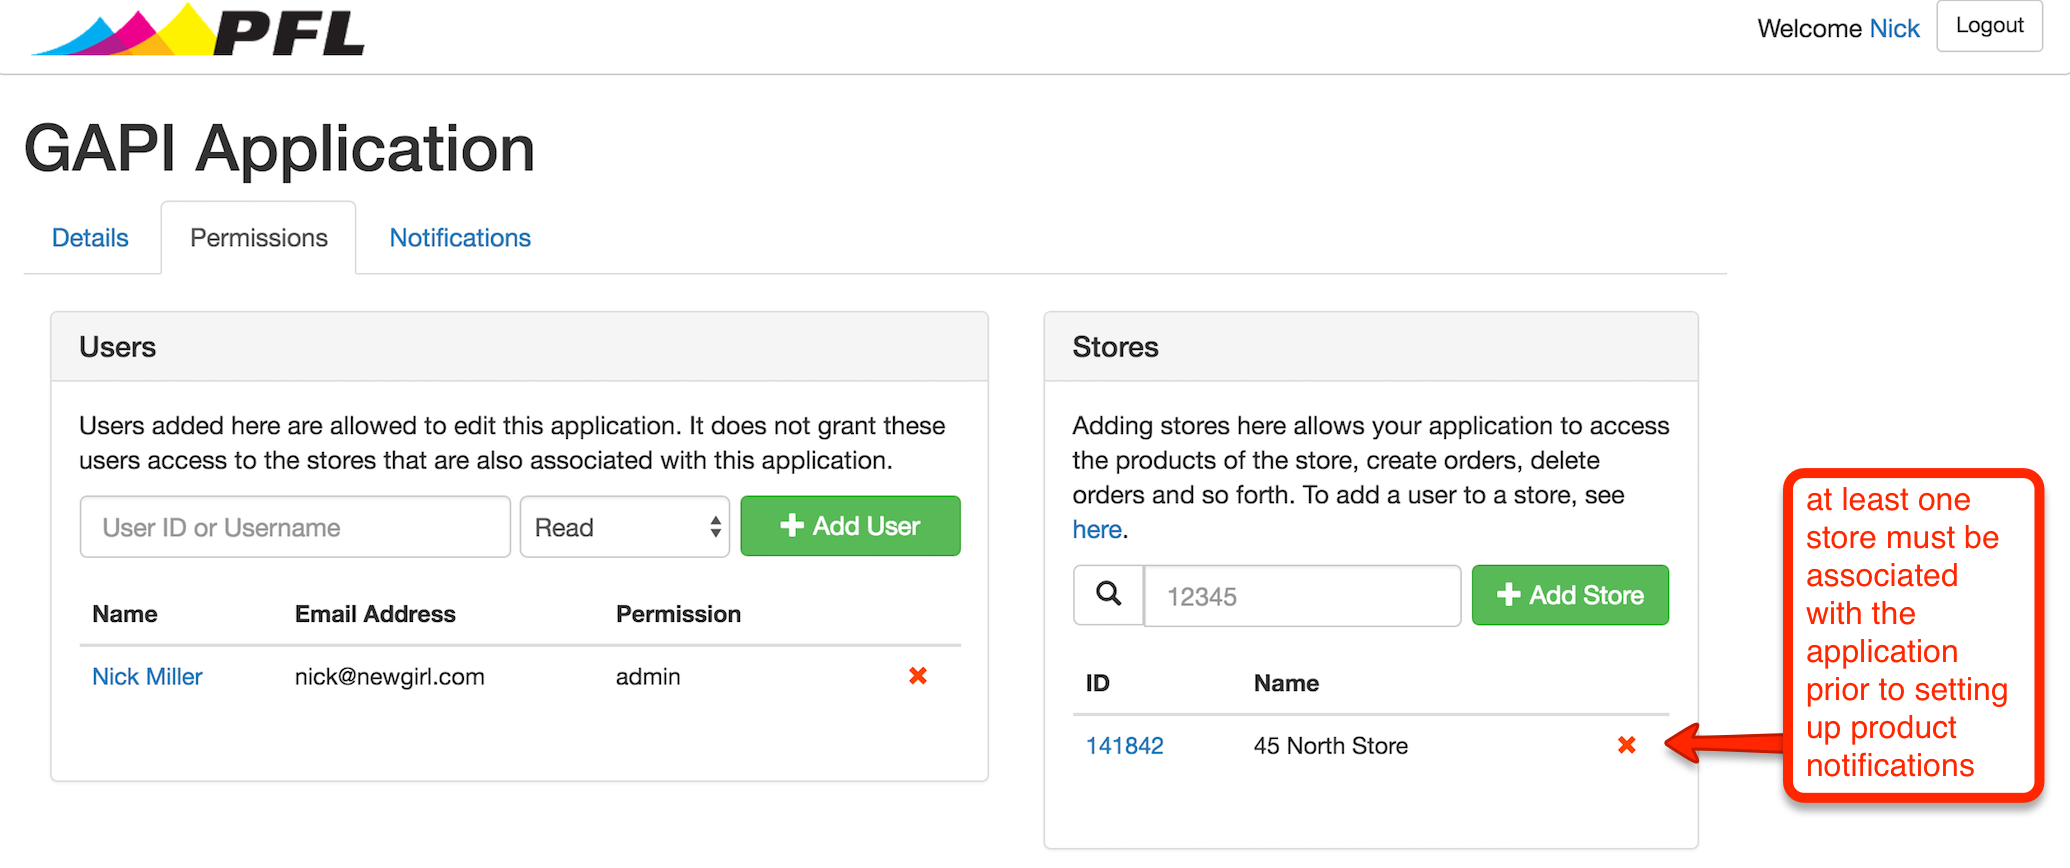
When creating applications in the GAPI, it is possible to set up webhooks to receive notifications when a product changes (for example, if the name or shipping methods are changed or someone deletes it). These webhooks are easy to create; they simply require a URL where the notifications will be sent.
Step 1 : Navigate to the 'Permissions' tab in the application to associate a store to the application (if a store has not already been added). Under 'Stores' simply search to find and add your store, or, if you know the Store ID enter it and click the 'Add Store' button.
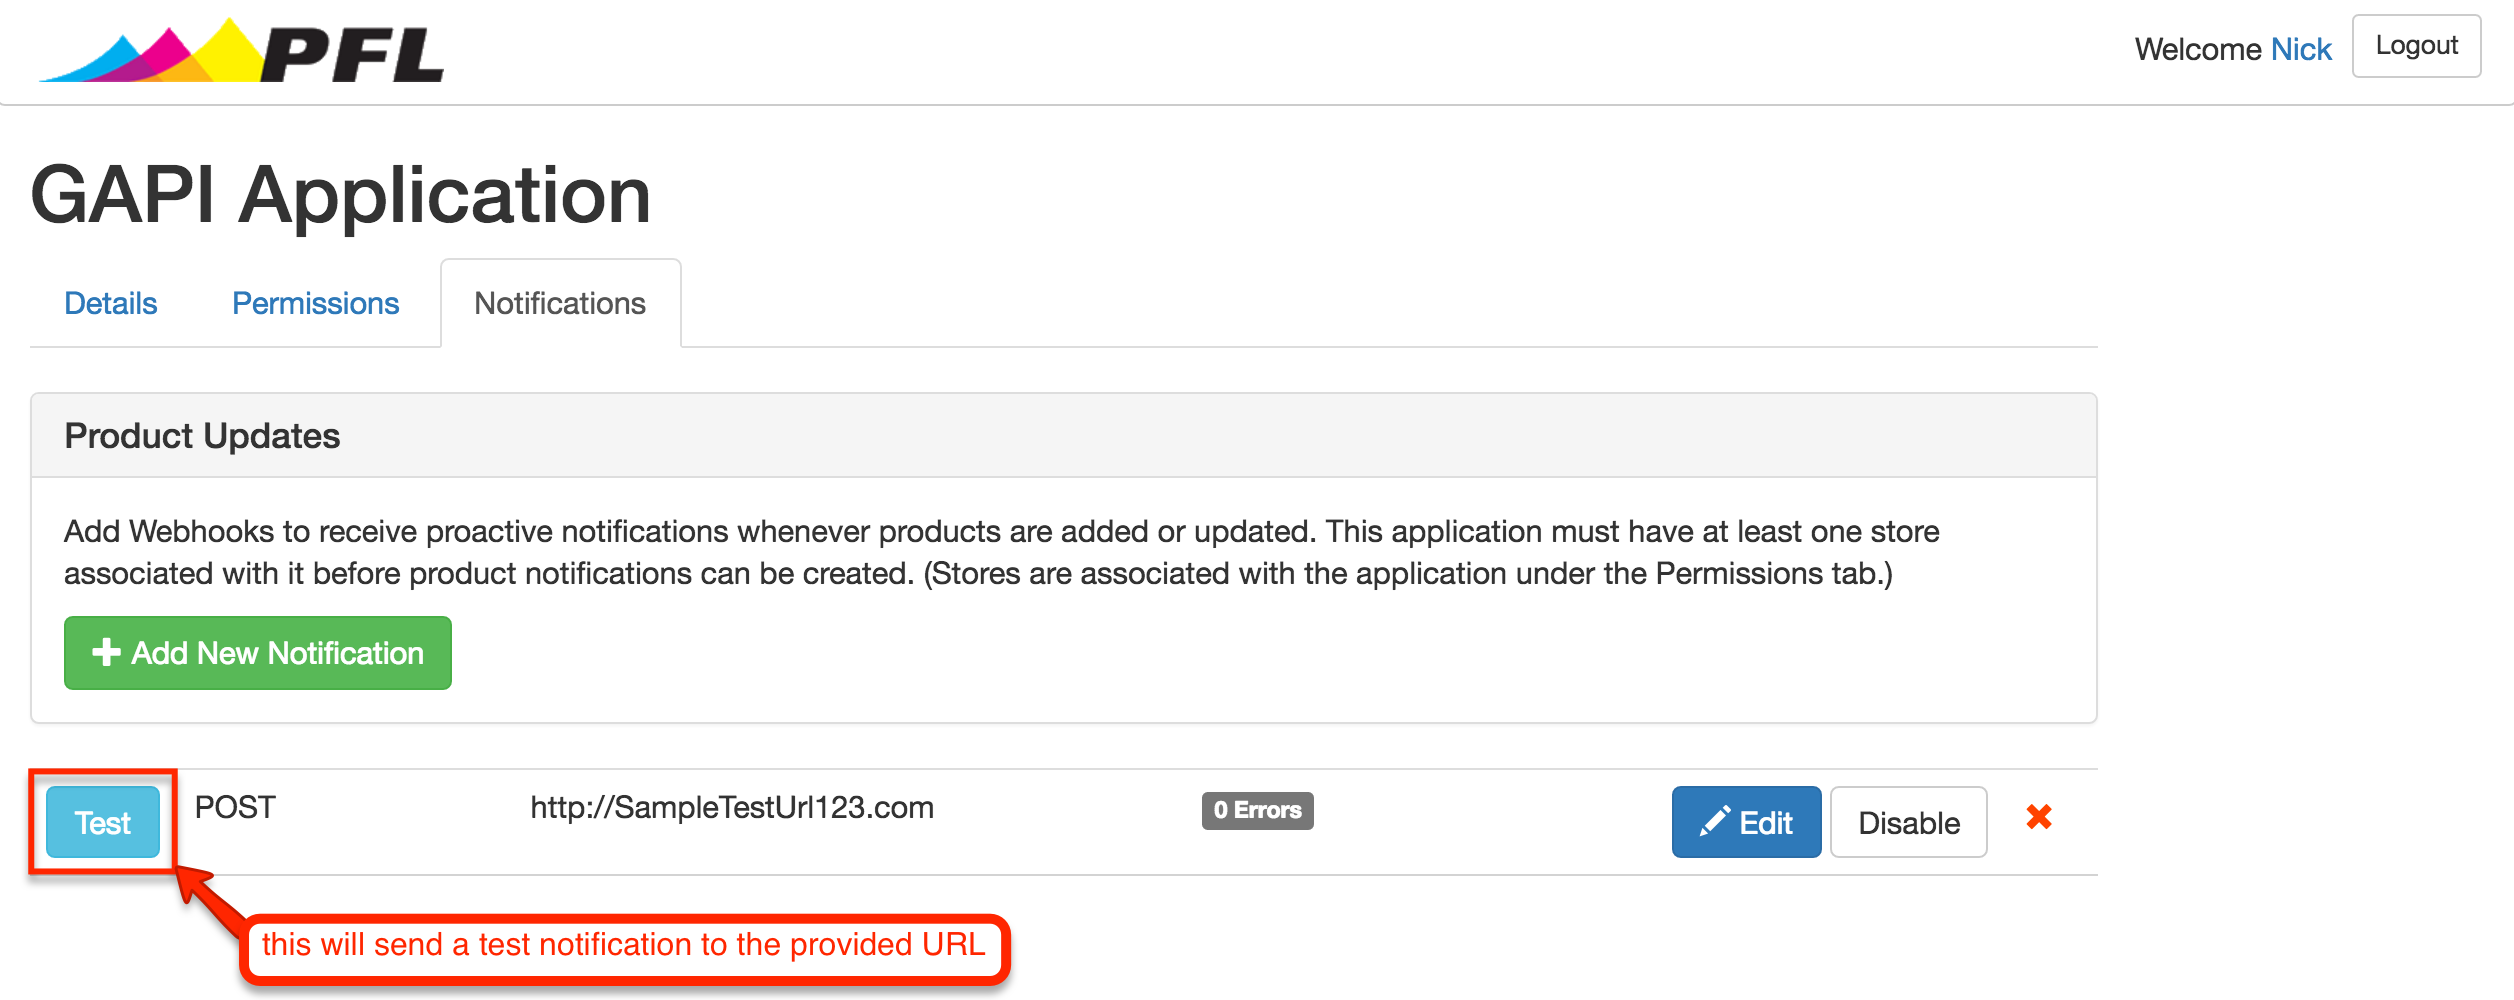
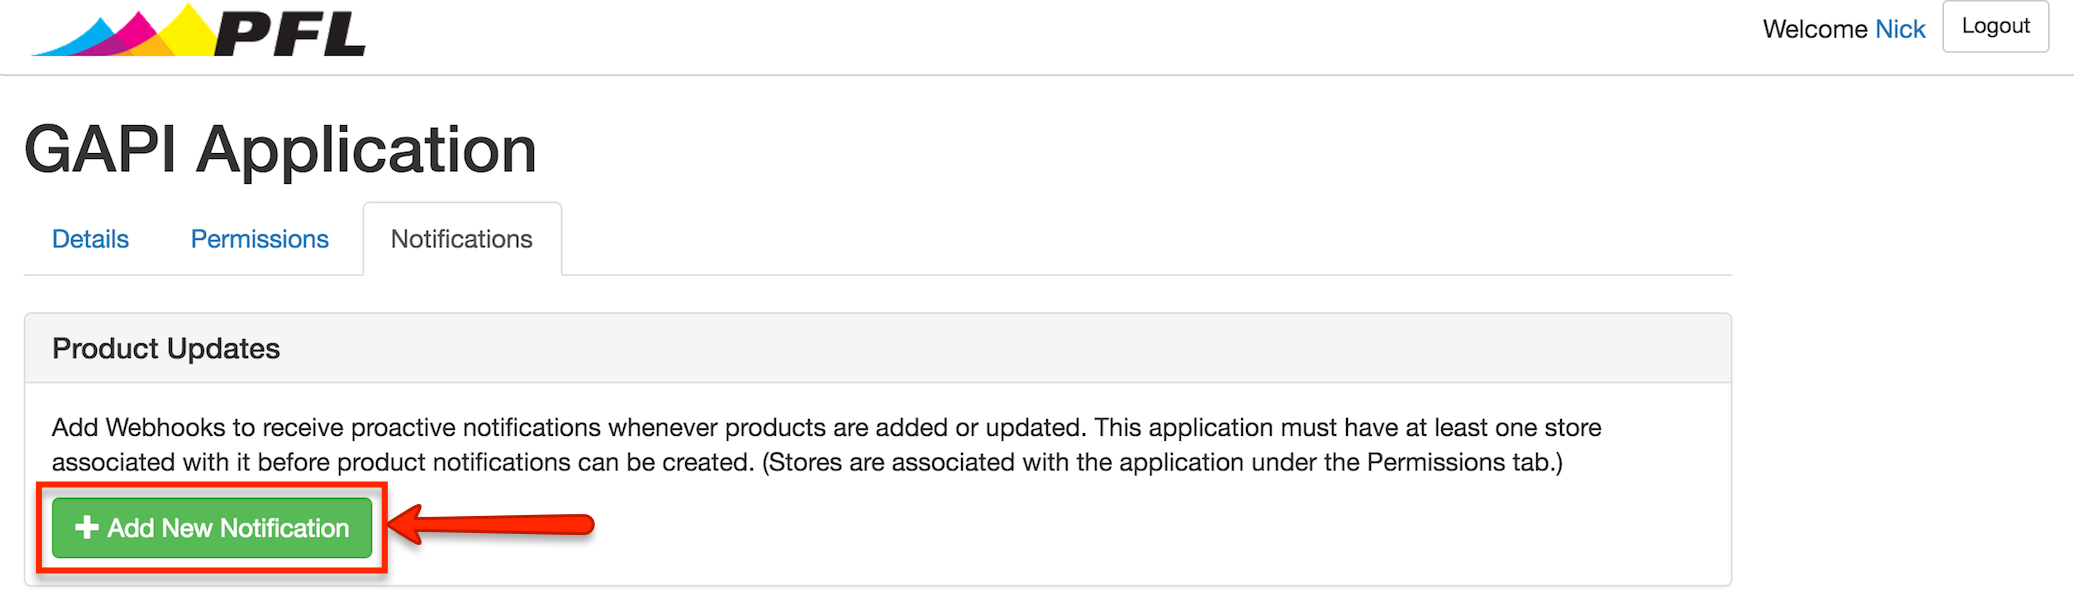
Step 2 : Navigate to the 'Notifications' tab and click the 'Add New Notification' button.
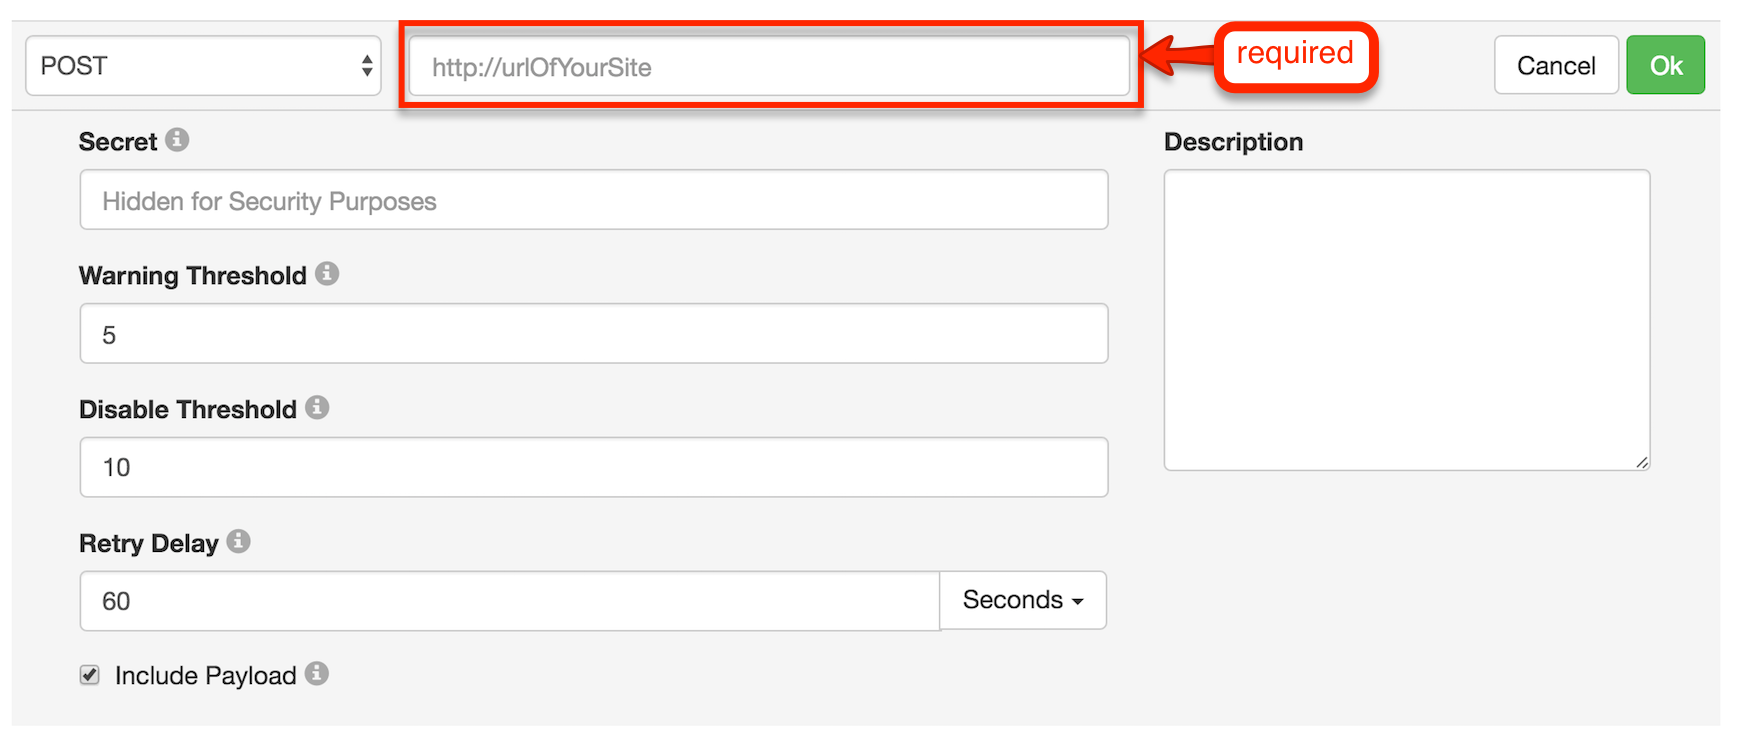
Step 3 : Fill in the details of where your product notifications will be sent and adjust any of the details. Click 'Ok' to save any changes and create the webhook.
| Store | If the application is associated with more than one store (a rare use case) a dropdown with the available stores will be shown |
| Secret | If set all notifications will include a SHA256 signature in the headers seeded with this value. |
| Warning Threshold | When the webhook concurrently fails this number of times an email will be sent to the support email address. (The support email address is the one specified on the 'Details' tab of the application.) The default is 5. To disable notifications for the warning threshold, set this to 0. |
| Disable Threshold | When the webhook concurrently fails this number of times the webhook will be disabled and an email will be sent to the support email address. (The support email address is the one specified on the 'Details' tab of the application.) The default is 10. |
| Retry Delay | The amount of time between the first and second attempt to submit a notification. The third attempt will be made twice as long after the second attempt. The default is 60 seconds. |
| Include Payload | When checked, the product payload will be included in the notification. This is checked by default. |
| Description | A description can be added to the webhook notification. |
| URL | Where the data should be pushed to. This supports template fields where {fieldname} can be used. Any first level property on the object can be used. Additionally {_meta.changeType} is supported. The following fields will always be populated: ID, Updated, _meta.ChangeType, StoreID |
Step 4 : Once saved, any webhooks will show up in a list under the 'Add New Notifications' button. There is a test button to try out the webhook and the webhook can also be edited, disabled, or deleted from here.